Using Portainer with docker-compose.yml | Easy and Fast
Published on April 3, 2024 · Niwo
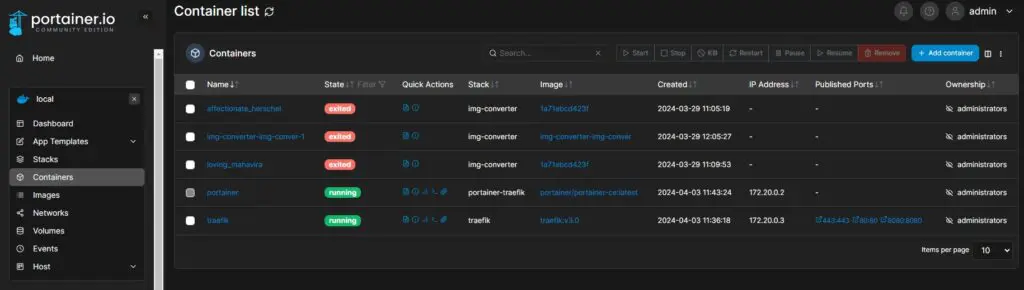
Using Portainer with a docker-compose.yml isn’t complicated, but sometimes we need to know which services are connected and how to access them. In this guide, we’ll teach you everything you need to deploy your Portainer service and monitor the containers Docker runs locally.
We will also explain how to connect to a remote Docker server within a secure local area network (LAN). Important: We won’t use robust security controls, as exposing it directly to the internet is not recommended.
Docker Compose for Portainer
To deploy Portainer with Docker Compose, we need to create a docker-compose.yml file with the following parameters:
yaml
services:
portainer:
container_name: “portainer”
image: portainer/portainer-ce:latest
ports:
- 9443:9443
- 8000:8000 # Optional port for the Edge client.
volumes:
# Portainer data storage
- ./portainer-datos:/portainer-datos
# Volume needed to access local Docker
- /var/run/docker.sock:/var/run/docker.sock
restart: always
With this, we only need to run `docker compose up -d` and Portainer will be running on our server. By default, port 9443 is used to access it, but we can change it by modifying the following line:

```yaml
    ports:
      - 10443:9443
      - 8000:8000 # Optional port for the Edge client.
    volumes:
For example, you can use port 10443 to access Portainer as follows:
It’s important that the internal port remains 9443, as this is the port exposed by Portainer for this web service.
Installing Portainer on Docker
Once the Portainer container is ready, we can access it and complete the installation to start using it. The most important thing during this installation are the credentials requested at the beginning; we will need them to access later.
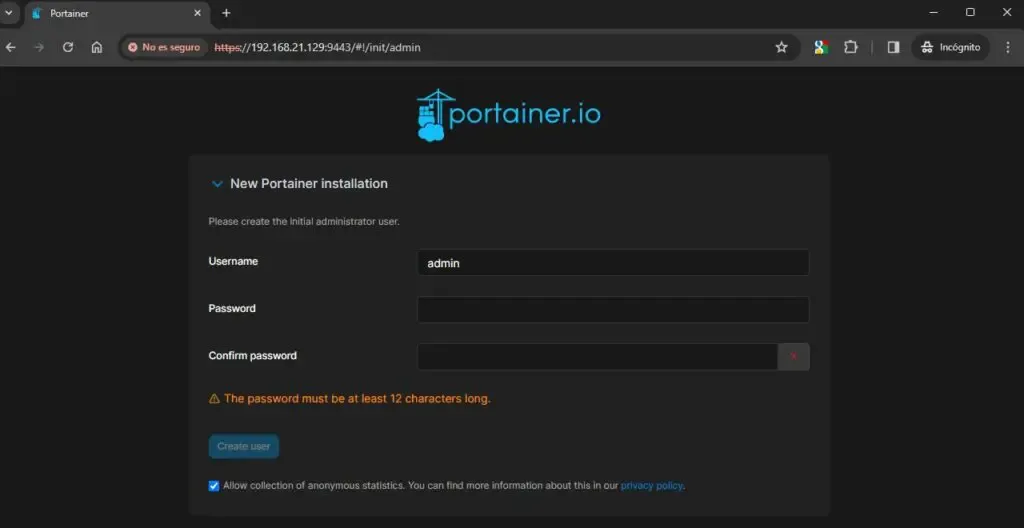
Remember that the IP used in the example is 192.168.21.129, which corresponds to the address of our Docker server. You must replace it with the correct URL of your own server:
https://IP_DOCKER:9443
It’s important to tell the browser that this is an HTTPS connection, as Portainer generates a self-signed certificate during startup.
Creating the Portainer Administrator User
The default administrator user is “admin”, but you can change it to whatever name you prefer. The important thing is that the password meets a minimum of 12 characters to be acceptable.
If the password does not meet the requirements, you will not be able to continue with the installation. Once you set a valid password, Portainer will proceed with the installation and ask for the credentials again to access the application’s main menu.
Restoring a Portainer Configuration from a Backup
If you have a backup of your Portainer configuration, you can restore it by selecting “Restore portainer from backup” in the initial menu (before creating the administrator key).
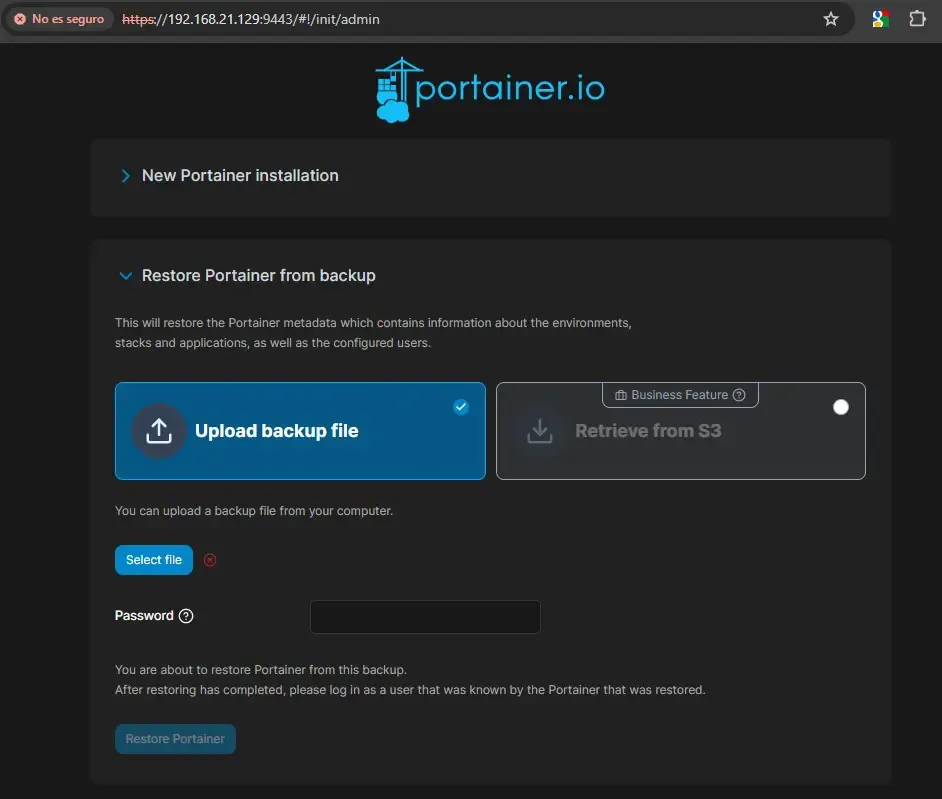
This will ask you to upload the backup file and enter the password, if the backup is protected. If you have the Business version, you can use an Amazon S3 storage to upload the backup.
Using Portainer to view Docker local services
If Portainer has access to the Docker socket, once installed you can access the administration of the local Docker services. This line provides the necessary access:
    ports:
      - 9443:9443
      - 8000:8000 # Optional port for the Edge client.
    volumes:
        # Portainer data storage
        - ./portainer-datos:/portainer-datos
        # Volume needed to access local Docker
        - /var/run/docker.sock:/var/run/docker.sock
    restart: always
This allows you to see your local containers, including the Portainer container itself, and manage them easily and visually. It is a very useful tool for large deployments.
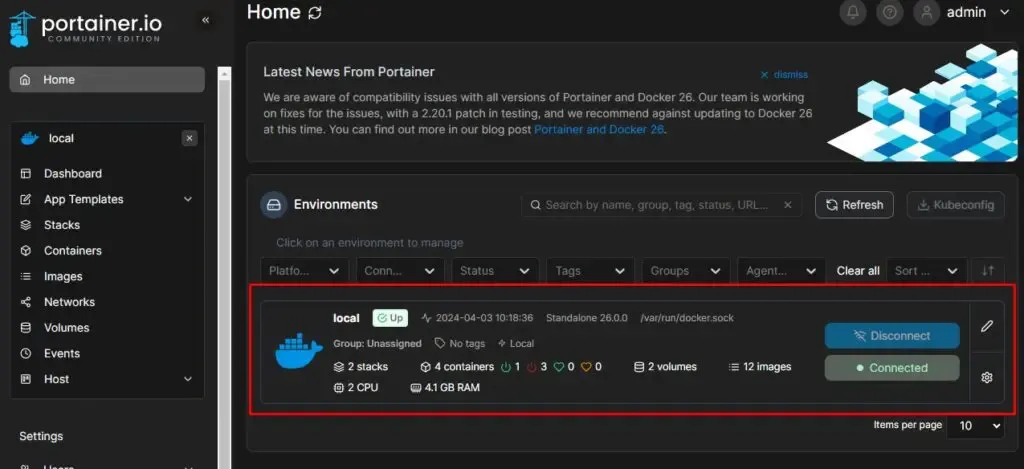
You can also connect to a remote Kubernetes service or even a Docker Swarm without Portainer running on them. However, these remote connections have individual requirements.
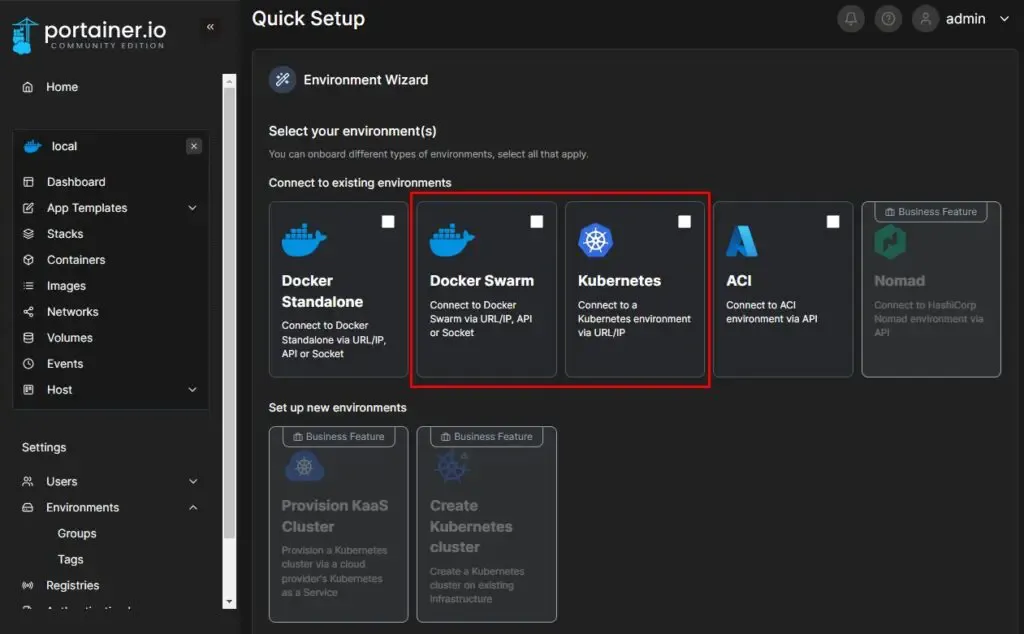
Portainer for Kubernetes
For Kubernetes, you can use the Portainer agent, which can be run in normal or Edge mode. The difference lies in the deployment method of the agent and whether we will use or not Edge Compute. Therefore, change the deployment method of the agent.
This information is more extensive, so we will not go into detail about it in this article. The basis is to use an agent that runs within the Kubernetes cluster you want to manage to be able to access its information.
Portainer for Docker Swarm
There are four options for connecting Portainer to Docker Swarm:
- Agent and Edge Agent: Both are containers that must be deployed within the Docker Swarm service before being able to connect Portainer. The difference is that one of them uses environment variables to configure a key for Edge Compute.
- Socket: A volume of the Docker socket is mounted on Portainer to access the containers running locally (typically for local use).
- API: Uses the native API of Docker Swarm to manage it.
The methods are varied and we will not go into detail about them in this article, beyond mentioning the available options.
Docker Compose, Portainer and Traefik
If you want to use Portainer to expose your service through a domain name, you can do so with Docker Compose, but you must take into account that you will have to add all the necessary information for Traefik to recognize it.
services:
  traefik:
    image: "traefik:v3.0"
    container_name: "traefik"
    command:
      #- "--log.level=DEBUG"
      #- "--api.insecure=true"
      - "--providers.docker=true"
      #- "--providers.docker.exposedbydefault=false"
      - "--entrypoints.web.address=:80"
      - "--entrypoints.web-secure.address=:443"
      - "--providers.docker.network=Docker-network"
    ports:
      - "80:80"
      - "443:443"
      #- "8080:8080"
    volumes:
      - "/var/run/docker.sock:/var/run/docker.sock:ro"
    networks:
      Docker-network:

networks:
  Docker-network:
    name: Docker-network
external: falseservices:
portainer:
container_name: "portainer"
image: portainer/portainer-ce:latest
expose:
- 9443
- 8000 # Optional port for the Edge client.
volumes:
# Portainer data storage
- ./portainer-datos:/portainer-datos
# Volume needed to access local Docker
- /var/run/docker.sock:/var/run/docker.sock
restart: always
networks:
Docker-network:
labels:
- "traefik.enable=true"
- "traefik.http.routers.insecure-portainer.entrypoints=web"
- "traefik.http.routers.insecure-portainer.rule=Host(`portainer.local`)"
- "traefik.http.routers.insecure-portainer.middlewares=force-secure-portainer"
- "traefik.http.middlewares.force-secure-portainer.redirectscheme.scheme=https"
- "traefik.http.middlewares.force-secure-portainer.redirectscheme.permanent=true"
- "traefik.http.routers.portainer.rule=Host(`portainer.local`)"
- "traefik.http.routers.portainer.entrypoints=web-secure"
- "traefik.http.routers.portainer.tls=true"
- "traefik.http.services.portainer.loadBalancer.server.port=9000"
networks:
Docker-network:
external: trueIt is important to highlight that, as Traefik already manages everything related to secure connection via HTTPS, the port used for communication between Traefik and Portainer is the HTTP port (port 9000) and not 9443.
With this example of what it would be like within a Traefik service, we attach both the Traefik docker-compose.yml and the Portainer one so you have the entrypoints of the Traefik.
With this, you can build your own docker-compose.yml to deploy your service as best suits your needs. These examples are for general use and only work with a local registry for Portainer, so you must adapt them to your needs mainly changing the domain “portainer.local” for one of your own.
Need to create a docker-compose.yml file? Try our Docker Compose Generator.