Putty | SSH, Telnet, or Console Connections All in One Program
Published on May 24, 2019 · Niwo
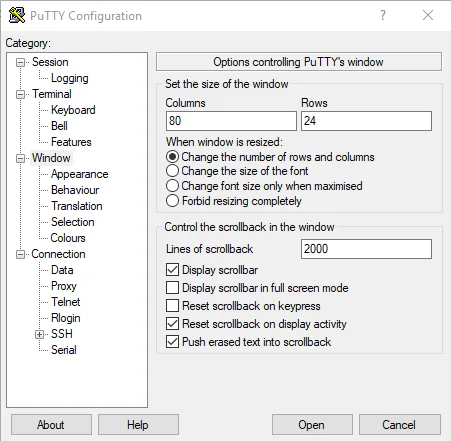
Putty is one of the oldest and most useful tools for those who manage telecommunications equipment, networks, or servers. It offers a versatile solution with a wide range of functionalities. In this article, we will explore the most important and commonly used options.

Putty Interface
As you can see in the image, Putty offers various categories that allow you to customize connections to equipment with restrictions or save logs to text files, for example.
How to Use Putty?
Putty supports 5 connection methods, but we will focus on the three most common: SSH, Telnet, and Serial. We will also provide basic information about the two less used ones: Raw and Rlogin.
Connecting with SSH
Connecting via SSH in Putty is simple. Just select the “SSH” checkbox, and by default, port 22 is used. You can change this if necessary. Then, enter the destination IP address and click “Connect.” However, there are additional parameters you can modify for a more robust SSH connection, especially useful with older equipment that doesn’t support SSH version 2.

Main configuration tab for SSH in Putty
Connecting with Telnet
Establishing a Telnet connection is as simple as entering the destination IP address and selecting “Telnet.” Port 23 will be automatically added, which can be modified if necessary. Additionally, you can adjust the “Ambiguity” between BSD and RFC 1408 and configure whether the Telnet connection is active or passive, according to your needs.

Telnet configuration tab in Putty
Connecting with Serial Port
This type of connection varies depending on the console port of the equipment. Many devices use USB or Micro-USB ports, but you can also find RJ-45 ports, which require two cables for a serial connection.
One of the cables is a USB to RS-232 adapter (often incorrectly called a “serial port”), as shown in the following image:
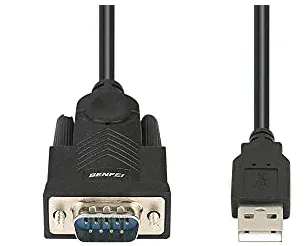
The other end of this cable connects to an RS-232 Female adapter (DB9 in the example, although some older equipment may use DB25).

Once all components are connected to your computer, the driver installation process begins, which is usually on a disk and varies depending on the cable model USB to RS-232 Male. We will not cover the installation of these drivers in this guide, but you will know they are installed when they appear reflected in Device Manager:

Device Manager - Windows
Serial Connection in Putty
Once any variant of the USB to serial cable name appears, observe the COM port it is associated with. Simply enter this port when connecting with Putty and you will have console access to the equipment, provided you are using the correct speed.

Serial Connection in Putty
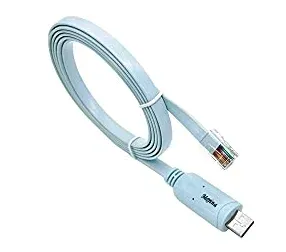
As an additional piece of information, there are cables that do all the work without needing an intermediate converter. If you can’t afford to buy them, there’s always the option of the converter method, which often gets you out of trouble. Here is a picture of a USB to RJ-45 cable:
Connecting with Rlogin
Rlogin is a system that allows you to establish a bidirectional remote connection with a remote computer. You can make a direct connection (client against server) or an indirect one (server against client). I don’t have any specific examples of this type of connection, but you can find more information in the Putty documentation or on an Oracle article:
Connecting with Raw
This connection, as its name suggests, is “raw.” You can establish it on virtually any port. Once established, you must manually perform the necessary requests. For example, if you connect to a server on port 80 with Apache, you can request the web page using an HTML header. This is useful for testing services and understanding what happens when connecting and requesting something from the server.
However, this connection is not very common. If you want more information, consult the Putty documentation:
How to Install Putty?
Installing Putty on Windows
Installation
To install Putty on Windows, simply download the file with the .msi extension from the official page and follow the instructions of the installation wizard.

Installation in Windows - Putty
Portable Putty
If you prefer a portable version, you can download it from the same page. These versions only require the executable file with the .exe extension to function.
Installing Putty on Linux
On Linux, install Putty using the file with the .tar.gz extension (qualified as “UNIX” on the downloads page). The installation is performed using the following lines: bash cd directory_del_tar_gz tar –zxvf putty-.tar.gz cd putty- ./configure make make install
Although the installation code may vary slightly, the above lines should work for most Putty versions thanks to the use of the wildcard `*`. In any case, make sure to use the command `tar -zxvf`, since once completed without errors, Putty will be installed.

### [Download Putty](https://www.chiark.greenend.org.uk/~sgtatham/putty/latest.html)

You can download Putty from the official project page:

[Official Page to Download Putty](https://www.chiark.greenend.org.uk/~sgtatham/putty/latest.html)

Remember that on the page you will find all available versions; you just have to select the file with the appropriate extension.

---

Need to configure SSH access to multiple servers? Try our **[SSH Config Generator](/en/herramientas/generador-ssh-config/)**.