How to Connect a Custom Domain to Your Blogger Blog
Published on June 17, 2019 · Niwo
- Steps to Connect a Custom Domain to Your Blog on Blogger
- 1. Domain Registration
- 2. Assigning DNS to Your Domain
- 3. Creating DNS Records for Your Domain
- 4. Configure Your Domain in Blogger
- 5. (Optional) Implement SSL (HTTPS)
- Do you have any questions about how to connect a custom domain to your blog?
Do you want to give your blog a more professional and personalized look? An excellent way to achieve this is by using a custom domain instead of the blogspot.com address. In this article, we explain how to connect a custom domain to your Blogger blog, taking it to the next level.
Steps to Connect a Custom Domain to Your Blog on Blogger
1. Domain Registration
The first step is to register your domain with a domain registrar. You can choose whichever you prefer, as the process is similar in most of them. I don’t recommend one specifically, as the choice depends on your preferences and budget.
2. Assigning DNS to Your Domain
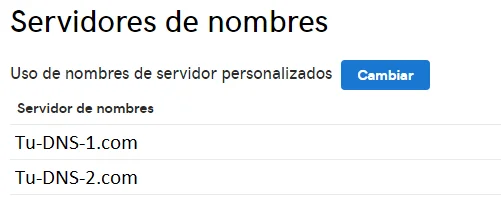
Once registered, you will need to assign your domain’s DNS (Domain Name System) servers to a public DNS provider. This allows the DNS to replicate your domain on other servers worldwide. A popular and free service is FreeDNS - Free DNS.
When creating a record for your domain in FreeDNS, they will provide you with the DNS servers that you need to assign in your registrar’s configuration. This ensures that only you have control over your domain name.
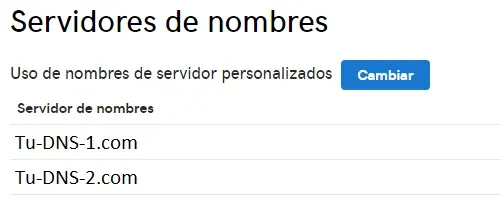 Assigning DNS to a Domain in GoDaddy
3. Creating DNS Records for Your Domain
Once your domain points to the assigned DNS, you will need to create the necessary DNS records. In reality, you only need five:
- Four A record type entries: These point to Google’s IP addresses.
- One CNAME record: This refers to a Google subdomain (usually “www”).
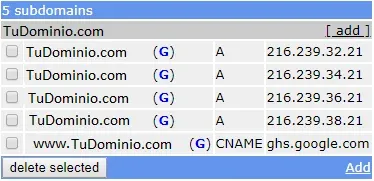 Example of A Record and CNAME - FreeDNS.afraid.org
As shown in the image, you will need to create these five records with the values provided by Google. Remember to replace the example data with your own.
4. Configure Your Domain in Blogger
With your blog configured at the DNS level, it’s time to tell Blogger to use your new domain. Go to Settings > Basic within the Blogger interface and look for the “Publishing” section. There you will find the “Blog address”.
 Example of address before being redirected to your new domain - Blogger
Select “+Configure a third-party URL for your blog”. This will open a new panel where you need to enter your domain. Make sure to include “www” at the beginning of the domain, as shown in the next image.
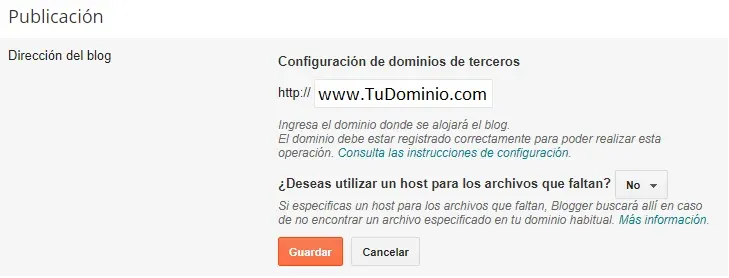 Domain configuration - Blogger
After saving, you will likely see a warning indicating that you have not verified domain ownership. This is normal and due to the fact that Blogger needs to confirm that you are the owner.
To verify it, you need to create two additional CNAME records in your DNS: one provided by Blogger (a random alphanumeric string) and another with a specific Google URL.
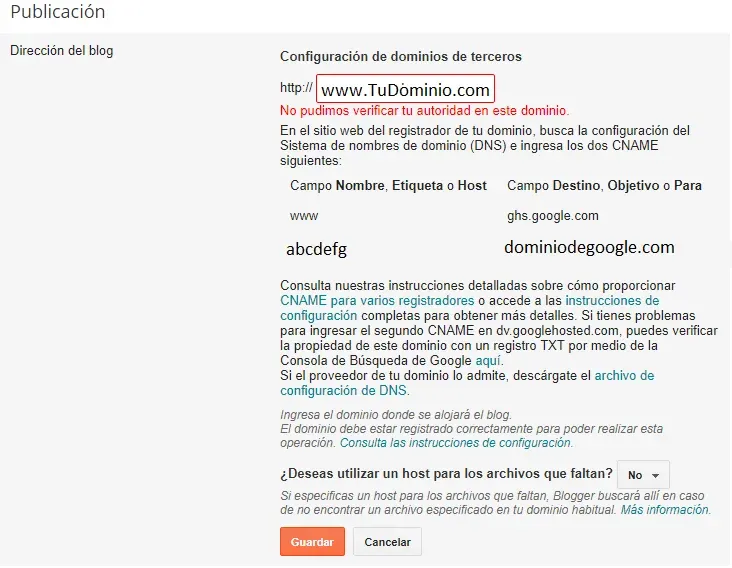 Error verifying Domain Authority - Blogger
The additional CNAME record will have a format similar to the following (replace the values with those provided by Blogger): “abcdefg” as an alias and “dominiodegoogle.com” as the destination URL.
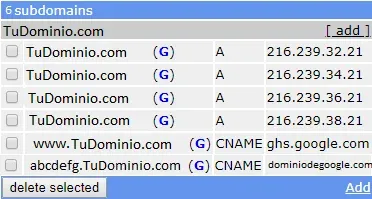 Example A Record and CNAME - FreeDNS
Keep in mind that DNS changes propagation can take some time (usually between a few minutes and 24 hours). Be patient, as Blogger needs to update its information with the new DNS records. In some cases, it may take up to 15 minutes.
Once you can save the configuration without errors, your blog will be ready to use your new domain!
5. (Optional) Implement SSL (HTTPS)
Although generally enabled by default in Blogger, it is important to verify that you have HTTPS protocol activated. This ensures that connections to your blog are encrypted and protected, improving security and the trust of your visitors. Blogger usually automatically redirects HTTP requests to HTTPS if this option is enabled in Settings > HTTPS.
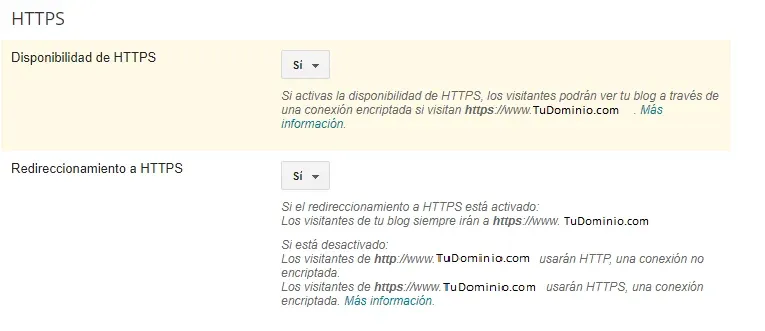 Enable HTTPS on Blogger
Do you have any questions about how to connect a custom domain to your blog?
If you have any questions or need further assistance, don’t hesitate to leave a comment. We understand that this process can be confusing at first, but it is a fundamental step for the growth and professionalization of your blog.